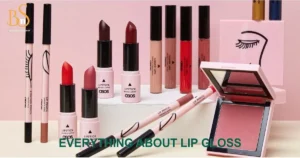
Lip gloss is a favorite beauty product for so many people. Homemade lip gloss allows you to create customized glosses with higher-quality ingredients without the hefty price tag of store-bought brands.
Making lip gloss at home is fun and surprisingly easy. You likely already have many of the basic ingredients in your kitchen. Homemade gloss comes together quickly with just a few essential oils, waxes, and pigments.
You can customize the colors, flavors, and formulas to your exact tastes. Having control over what goes on your lips is empowering. Creating personalized beauty products is also very satisfying. Let us explore various recipes and techniques for making your lip glosses.
If you were interested in feathers mascara read this: Pretty vulgar feathers mascara.
Ingredients
Vaseline-Based Lip Gloss
Vaseline is a simple and affordable base for gloss. This classic recipe requires just two ingredients for a sheer, moisturizing gloss.
Coconut Oil Lip Gloss
Coconut oil adds hydration and shine. Its creamy texture melts onto lips for a nourishing gloss. This tropical three-ingredient gloss uses coconut oil as the base.
Lip Gloss with Beeswax
Beeswax helps glosses set to a smooth, non-sticky finish. Recipes with beeswax can include more add-ins like essential oils and pigments for customized colors and flavors.
Steps
Making Vaseline-Based Lip Gloss
This basic gloss comes together in just a few minutes. Simply melt 1/2 cup of Vaseline in a small saucepan over low heat. Remove from heat and stir in 1/4 cup of mineral or baby oil. Pour into containers and allow to harden before applying to lips.
Creating a Moisturizing Coconut Oil Lip Gloss
To make this hydrating gloss, measure 1/2 cup of coconut oil and heat it until just melted. Pour into a heat-safe cup or jar and then slowly stir in 10-15 drops each of vitamin E oil and a flavoring oil like mint or cinnamon. Allow to thicken before use.
Making a Lip Gloss with Beeswax
Melt 1/4 cup beeswax in a double boiler. Once softened, add 1/2 cup sweet almond or jojoba oil along with 2 teaspoons of liquid flavoring or coloring if desired. Pour into containers and let set fully before capping.
Homemade Lip Gloss
Making lip gloss at home allows you to control the ingredients and customize the colors, flavors, and formulas to your tastes. Here is an overview of a basic gloss anyone can create:
Ingredients
- 1/4 cup beeswax pastilles
- 1/2 cup sweet almond or jojoba oil
- 5-10 drops of vitamin E oil
- Food coloring, essential oils, or liquid flavorings (optional)
Equipment
- Small saucepan or double boiler
- Glass jars or containers with lids
- Micropore tape (for sealing lids during setting)
- Spoon or silicone spatula for mixing
Instructions
- Melt the beeswax in a double boiler over medium heat, stirring frequently until completely smooth.
- Pour the almond or jojoba oil into the melted beeswax. Stir to combine well.
- Add 5-10 drops of vitamin E oil and any additional ingredients like essential oils, food coloring, or flavoring at this stage. Stir gently to incorporate.
- Pour or spoon the warm gloss mixture into clean glass jars or containers, leaving 1/4 inch headspace.
- Seal the containers with lids and use micropore tape to tape around the edge during the setting process. Let cool completely before touching, for at least 2 hours.
- Once fully hardened, remove the tape and apply your homemade lip gloss! Reapply to keep lips moisturized. Store unused portions with lids sealed.
What’s In This Homemade Lip Gloss Recipe
Here are the key ingredients in this basic beeswax lip gloss formula:
Liquid Lecithin
As an emulsifier, lecithin helps blend the oil and wax components into a smooth, non-separating gloss.
Carrier Oils
Almond or jojoba oils are lightweight yet nourishing emollients that give lips a radiant look and feel.
Beeswax
This hard wax is the thickening agent that sets the final gloss into its silky semi-solid texture upon cooling.
Lip gloss base without beeswax
For those wanting a less thick formula, you can create a gloss base without beeswax. Melt together 1/2 cup oil (like sweet almond or coconut oil) with 1 teaspoon carnauba or candelilla wax over low heat, stirring constantly. Pour into jars and allow to harden before use. This base will be softer and lower melting, perfect for warmer weather.
Colors, Tints & Dyes
Add personality to your glosses with natural or synthetic coloring agents. A few drops of liquid makeup colors will tint glosses, or use micas for shimmer effects. Start with just 1-2 drops and build the shade. Annato extract, chlorophyll powders, and beets can provide natural hues too.
Flavoring oils are another fun way to customize. Try mint, grapefruit, cherry, or vanilla for enticing scents on the lips. Essential oils should always be diluted per safety guidelines.
How to Make Lip Gloss Base?
- Candelilla or carnauba wax bases will be firmer than beeswax but shine nicely.
- Lanolin wax makes for ultra-moisturizing lip care.
- Neutral oils like almond, coconut, or jojoba are great for lightweight, hydrating bases.
To make any base, melt the hard wax(es) in oil over low heat. Continuously stir so it blends smoothly without seizing. Once the wax is fully dissolved, remove it from heat and allow it to thicken as it cools. Pour into containers.
For tinted bases, stir in liquid lip-safe dyes or micas while still warm. Leave the base plain for customizing different gloss shades later on. Store tightly closed bases on a shelf for up to one year.
How to Make Lip Gloss to Sell?
If you plan to produce gloss for customers, certain regulations apply:
- Research FDA requirements for cosmetics labeling and ingredient listings.
- Ensure a sterile work environment and ingredients sourced from reputable suppliers.
- Package glosses attractively in airless pump bottles or tubes for hygiene.
- List full product contents and expiration dates prominently on the packaging.
- Consider liability waivers and product liability insurance for your business.
- Market glosses through websites, craft fairs, or cosmetic boutiques.
Keypoints About Making Lip Gloss
Here are some important things to keep in mind when making lip gloss at home:
- Use cosmetic-grade ingredients that are formulated for lip use, as some oils and waxes can be irritating.
- Sterilize all equipment and work surfaces with isopropyl alcohol before use to avoid contamination.
- Heat ingredients slowly and carefully in a double boiler setup to prevent overheating or scorching.
- Allow homemade glosses to set completely before applying or distributing, about 2-4 hours depending on the formula.
- Store glosses upright with lids tightly closed in a cool, dry place away from heat and direct sunlight.
- Glosses have a basic shelf life of 6-12 months if preserved properly with antioxidants like vitamin E.
- Consistency and texture can be altered by adjusting the ratios of oils to waxes used. Play with formulations to create your perfect gloss.
- Add very small amounts of dyes, 1-3 drops max per batch until achieving the desired shade.
Frequently Asked Questions
How do you make homemade lip gloss?
We’ve covered the basic process which involves melting ingredients like beeswax, oils, and waxes together to form a smooth, spreadable base. Then you can customize it with colors, flavors, and more. Always work over low heat and allow the gloss to set fully before using.
What are the ingredients in lip gloss?
Typical ingredients include emollients like oils to moisturize lips, waxes like beeswax or candelilla to give it a smooth texture, antioxidants like vitamin E for preservation, and optional colors, flavors, and scents.
How do you make lip gloss with 3 ingredients?
One of the easiest recipes uses just coconut oil, vitamin E oil, and flavoring oil. Melt and blend the coconut oil, then stir in 10-15 drops each of vitamin E and mint/cinnamon oil. Pour into containers and allow to thicken before applying.
How do I start my own lip gloss business?
Research regulations, source high-quality ingredients, sterilize equipment, develop your brand, market attractively packaged glosses, consider insurance, and look into licensing if selling. Produce consistent, customizable products others will enjoy and want to purchase.
Final Thoughts
Creating your lip glosses opens up a world of possibilities for customizing colors and formulas to your exact tastes. The recipes covered provide a wonderful starting point, but from there the options are endless based on the different ingredients and combinations you experiment with.
Homemade gloss lets you control what goes on your lips down to the last detail. You’ll save money compared to store brands too. With basic materials found in most homes, anyone can craft glosses without complicated equipment or skills. I hope this guide has inspired and equipped you to start formulating your special gloss creations.
Making lip products can also be quite therapeutic and help boost confidence through the awe of small-batch cosmetic chemistry. Don’t be afraid to follow your instincts and play you may discover your next signature gloss shade or best-selling product. Above all, have fun designing glosses you love to wear every day.

A seasoned beauty enthusiast, Rachel James has honed her craft in beauty style innovation over 7 years, blending artistry with precision to redefine beauty allure.